

Why Outdoor Faucet Repair Matters for Your Home
Outdoor faucet repair is a critical home maintenance task that can save you thousands of gallons of water and prevent costly property damage. Whether you're dealing with a dripping spout, leaky handle, or frozen pipes, understanding the basics can help you tackle most issues yourself.
Quick Repair Solutions:
- Handle leaks - Tighten the packing nut or replace worn washers
- Spout drips - Replace the valve stem washer and O-ring
- Base leaks - Check and replace the packing gasket
- No water flow - Clear vacuum breaker obstructions
- Frozen damage - Thaw pipes safely and replace cracked components
A dripping outdoor faucet is more than an annoyance; it's expensive. A single leaky faucet can waste nearly 2,000 gallons annually. That steady drip can also cause foundation damage, rust, and even interior flooding if the leak spreads inside your walls.
Fortunately, most outdoor faucet problems have simple solutions. You can fix common issues like worn washers or loose connections in about 30 minutes with basic tools. This guide covers identifying leak sources, gathering materials, and performing step-by-step repairs. We'll also discuss when it's smarter to call professionals, especially for complex frost-proof faucets or leaks causing interior damage.

Find more about outdoor faucet repair:
Diagnosing the Drip: Signs and Common Causes
Before starting an outdoor faucet repair, you must diagnose the problem. A quick inspection usually reveals the source of the leak.

Signs Your Outdoor Faucet Needs Repair
Look for these signs that your faucet needs attention:
- Visible drips from the spout when the faucet is off are the most common sign. A single leaky spigot can waste nearly 2,000 gallons per year.
- Puddles around your foundation indicate a leak that can cause structural damage and mold if ignored.
- Sputtering or low water pressure can point to internal issues like blocked valves or compromised seals.
- Rust or corrosion on the faucet indicates water is escaping and deteriorating the metal.
- Water damage inside your house near the pipe is the most serious sign. It could mean a burst pipe within the wall. Stop and call for professional help immediately. Our Leak Detection Services can pinpoint these hidden problems before they cause major damage.
Common Reasons for a Leaky Faucet
Most leaks trace back to a few common culprits:
- Worn-out washers or O-rings are the most frequent cause. These rubber seals degrade over time, allowing water to escape.
- A loose packing nut behind the handle allows water to leak when the faucet is on. Often, simply tightening it solves the problem.
- A damaged valve stem can prevent the washer from seating correctly, causing persistent drips.
- Frost damage occurs when trapped water freezes and expands, cracking the faucet body or pipes. The leak may not appear until the spring thaw.
- A faulty vacuum breaker can cause leaks from the top of the faucet when it's running as its internal parts wear out.
- High water pressure accelerates wear on all faucet components, leading to premature failure.
Gearing Up: Tools and Materials for the Job
Proper preparation is key for any outdoor faucet repair. Gathering your tools and materials beforehand prevents frustration mid-project. Most repairs require only basic tools and common replacement parts.

List of Tools and Materials
- Adjustable wrench: A 10-inch wrench is versatile enough for most packing nuts and valve assemblies.
- Slip-joint pliers: For gripping smaller components.
- Phillips and flat-head screwdrivers: For removing handle screws.
- Faucet repair kit: Contains an assortment of common washers and O-rings. Bring the old parts to the hardware store to ensure a perfect match.
- Plumber's tape (PTFE tape): Seals threaded connections to prevent leaks.
- Stiff-bristled brush: To clean mineral buildup and corrosion from internal parts.
- Rags and penetrating oil: For cleanup and loosening stubborn, rusted parts.
Step-by-Step Outdoor Faucet Repair Guide
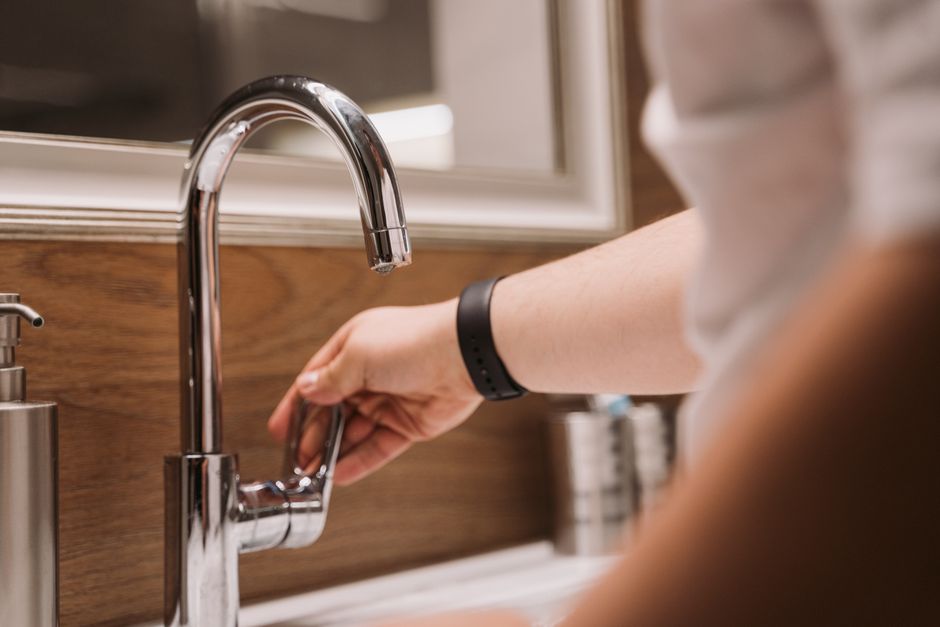
With your tools ready, you can begin the outdoor faucet repair. The first and most critical step is shutting off the water supply. This is typically an indoor valve in your basement or crawlspace on the pipe leading to the outdoor faucet. If you can't find it, turn off your home's main water supply.
Once the supply is off, drain the line by opening the outdoor faucet until it stops running. This prevents a surprise splash during disassembly.

For a visual guide, you can watch this step-by-step video to learn how to fix a leaky outdoor faucet.
Fixing a Leak from the Faucet Handle
A leak from the handle while the water is running is often the easiest fix, usually caused by a loose packing nut or a worn packing washer.
First, try tightening the packing nut located behind the handle. A small 1/8 to 1/2 clockwise turn with a wrench is often enough to stop the leak. If it still leaks, you'll need to replace the packing washer.
For faucet stem disassembly, shut off the water and drain the line. Remove the handle screw and handle, then unscrew the packing nut. Pull out the valve stem. Locate the packing washer or O-ring on the stem. Replace it if it appears worn or cracked. Clean any mineral buildup off the components with a stiff brush.
Replace the packing washer, reassemble the faucet, turn the water supply back on slowly, and check for leaks.
If this repair feels overwhelming, our team offers comprehensive Plumbing Services in Bridgeville, PA to get your faucet working perfectly.
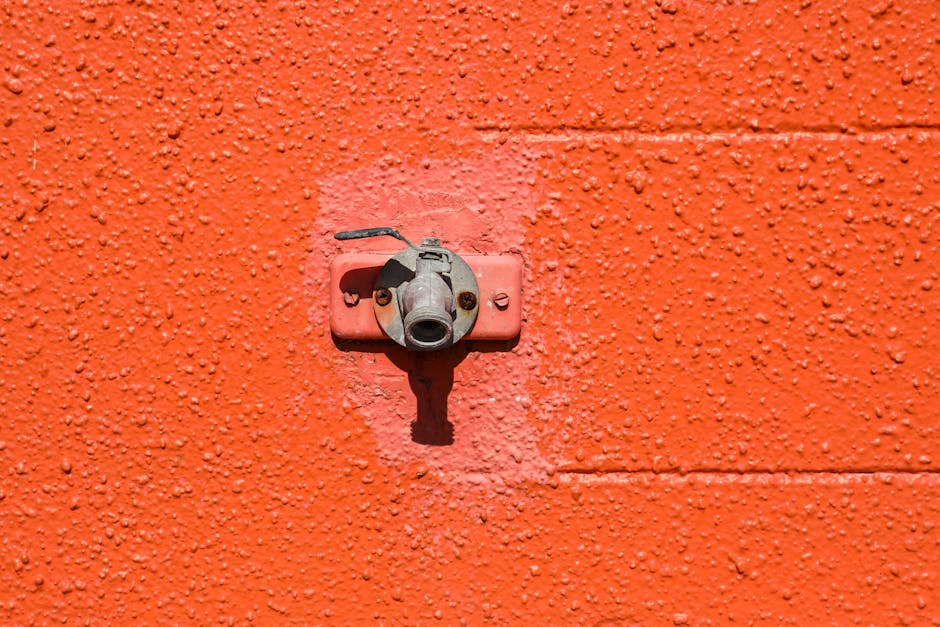
Fixing a Leaky Spout: A Common Outdoor Faucet Repair
A constant drip from the spout when the faucet is off usually indicates a worn-out washer at the end of the valve stem. This is a common and manageable outdoor faucet repair.
After shutting off the water and draining the line, perform the valve stem removal by taking off the handle and packing nut, then pulling the entire stem out. Frost-proof faucet stems can be over a foot long. At the end of the valve stem, a small screw holds the rubber washer in place. Remove the screw and old washer, then replace it with a new one of the exact same size.
While the stem is out, inspect and replace any worn O-rings along its length. Before reassembly, use a stiff brush for cleaning the valve seat inside the faucet body. A clean seat is essential for a good seal. Reinsert the stem, reassemble the faucet, and turn the water back on to test.
Replacing a Leaky Vacuum Breaker
A leak from the top of your faucet while it's running points to a faulty vacuum breaker, a safety device that prevents water contamination. The vacuum breaker function prevents dirty hose water from being siphoned back into your home's water supply during a pressure drop.
Removing the cap is usually straightforward; it may screw off or be held by a set screw. Inside, you'll find worn rubber parts. Replacing internal parts is simple. Many hardware stores sell complete vacuum breaker replacement kits, which are often more reliable. Remove the old parts, clean the housing, and install the new components according to the instructions.
For complex repairs, our technicians provide expert Plumbing Services in Mt. Lebanon, PA to handle any outdoor faucet repair challenge.
Prevention and Advanced Faucet Knowledge
Understanding your faucet type and performing regular maintenance helps prevent leaks and costly damage, especially from freezing.

Frost-Proof vs. Regular Faucets
Knowing the difference between regular and frost-proof faucets is crucial for outdoor faucet repair, as their designs and repair methods differ. A regular faucet has its valve at the exterior wall, leaving water in the pipe vulnerable to freezing. Frost-proof faucets have a long stem with the shut-off valve located inside the warm part of your home, allowing the exterior pipe to drain and preventing freezing.
FeatureStandard Faucet (Hose Bibb)Frost-Proof Faucet (Sillcock)DesignSimple valve body mounted directly to the wallLong internal stem extending through wall into warm interiorFreeze ProtectionMinimal - water sits right up to the valve, requires careful winterizationAutomatically drains exterior pipe section when shut offRepair ComplexityGenerally simpler, all parts easily accessible from outsideMore complex due to long stem and internal valve location
Repairing frost-proof faucets is more complex due to the long stem, often requiring brand-specific kits. Leaks inside the wall may require opening the interior wall for access.
How to Winterize Your Outdoor Faucet
Proper winterization is critical for preventing burst pipes. This simple routine can save you from major headaches.
- Disconnect hoses: This is the most important step, as it allows the faucet to drain properly.
- Shut off the interior valve: Locate the dedicated shut-off valve for the outdoor faucet (usually in a basement or crawlspace) and turn it off.
- Drain the faucet: Open the outdoor faucet to drain any remaining water from the pipe. Leave it open through the winter.
- Install an insulated cover: Place an inexpensive foam cover over the faucet for extra protection.
If you need help, our team provides expert Plumbing Services in Bethel Park, PA to handle all your winter preparation needs.
When to Replace vs. Repair: An Important Outdoor Faucet Repair Decision
Sometimes, replacing the faucet is a better long-term solution than repairing it. Consider replacement in these cases:
- Severe corrosion: If the faucet body is heavily rusted or pitted, its integrity is compromised.
- Cracked faucet body: A crack, often from freezing, cannot be repaired. The faucet must be replaced.
- Stripped threads: If threads on the spout or internal components are stripped, a tight seal is impossible.
- Multiple failed repairs: If leaks persist after several repair attempts, replacement is more economical.
- Age and general wear: Consider replacing a very old faucet with a modern frost-proof model to improve reliability.
If you're unsure whether to repair or replace, our Outdoor Faucet Repair Services team can provide expert advice.
Frequently Asked Questions about Outdoor Faucet Repair
Here are answers to common questions about outdoor faucet repair.
Why does my outdoor faucet only leak when the hose is connected?
This common problem is caused by back pressure when a hose is attached. The most likely cause is a worn-out washer in the hose coupling. This rubber ring degrades over time and fails to create a proper seal under pressure. This is an easy fix: simply replace the washer inside the hose's connector.
Also, ensure the hose connection is tight. If the leak persists, the faucet's threads may be worn, requiring replacement.
What should I do if the faucet leak is causing damage inside my house?
Water damage inside your home from an outdoor faucet is an emergency. Act immediately to prevent costly repairs.
First, shut off your home's main water supply. This valve is typically in the basement or a utility room. This usually indicates a burst pipe inside the wall, often from freeze damage. Water behind drywall can cause structural damage, mold, and electrical hazards.
Do not attempt this repair yourself. Call for professional Leak Detection Services. Our technicians can locate the source and recommend the best course of action to prevent further damage.
What is the difference between a spigot, hose bibb, and outdoor faucet?
These terms are used interchangeably and all refer to the outdoor water tap for your garden hose. "Outdoor faucet" is a general term, "spigot" is a common alternative, and "hose bibb" is the technical term used by plumbers.
No matter what you call it, we understand and can perform the necessary outdoor faucet repair.
Your Go-To for Tough Plumbing Problems
Fixing a simple outdoor faucet repair is a satisfying DIY project that saves water and protects your home. Most common repairs, like replacing washers or tightening nuts, are manageable for homeowners with basic tools.
However, some problems require professional expertise, such as burst pipes inside walls, complex frost-proof faucet repairs, or a faucet that is seized with corrosion. Knowing when to call a professional is key. If you have interior water damage, have failed at multiple repair attempts, or feel overwhelmed, it's time to call for help.
At Sureway Comfort, our experienced technicians use a streamlined process to get the job done right. We serve Bridgeville, Mt. Lebanon, Bethel Park, and the surrounding areas, ready to tackle any plumbing challenge your home throws at us.
Your peace of mind is worth more than the frustration of wrestling with a stubborn repair. For expert assistance with your plumbing system in the Mt. Lebanon area, contact us today to ensure your outdoor faucets are in top shape.


.avif)


